THE WORLD THROUGH A FULL SPECTRUM INFRARED CAMERA
Full spectrum infrared photography opens up a world of creative possibilities and technical applications. By capturing light beyond the visible spectrum, photographers can create unique and striking images that are not possible with visible light. Whether you're interested in exploring the surreal world of infrared photography or analyzing material composition with a full spectrum camera, full spectrum photography is a fascinating and rewarding field to explore. Infrared photos are taken with a full spectrum camera and special infrared filters on the lens.
What is Infrared Photography?
A standard digital camera has several filters in front of the sensor that block infrared and UV light. A full spectrum camera has those built in filters removed allowing all light onto the sensor. To create infrared images, filters at a specific wavelength are attached to the lens. For instance, a 590 nanometer filter allows all light above 590 to enter the sensor. Visible light spectrum ranges from around 380 nm to 750 nm with infrared above 700. The limits are not sharply defined so there is some wiggle room. The lower the filter number, the greater amount of visible light enters the image for more vibrant colors. The greater the filter like the standard Hoya R72 is mostly black and white with some color. By the time you get to the 830 nm filter, it's only black and white.
When using different IR filters, white balance is very important. any filter below 665 nm, use a grey or white card for white balance. Anything above 665, use green foliage. The 665 nm filter can use both as a white balance option.
What is the Advantage of a Full Spectrum Camera?
The main advantage of using a full spectrum camera is the ability to capture images beyond the visible spectrum. This allows photographers to explore new creative possibilities and capture unique images that are not possible with a regular camera. Infrared photography, for example, can create surreal and dreamlike images that are not possible with visible light. Full spectrum cameras can also be used for scientific or technical applications, such as analyzing material composition or detecting hidden defects.
Death Valley Palm Trees
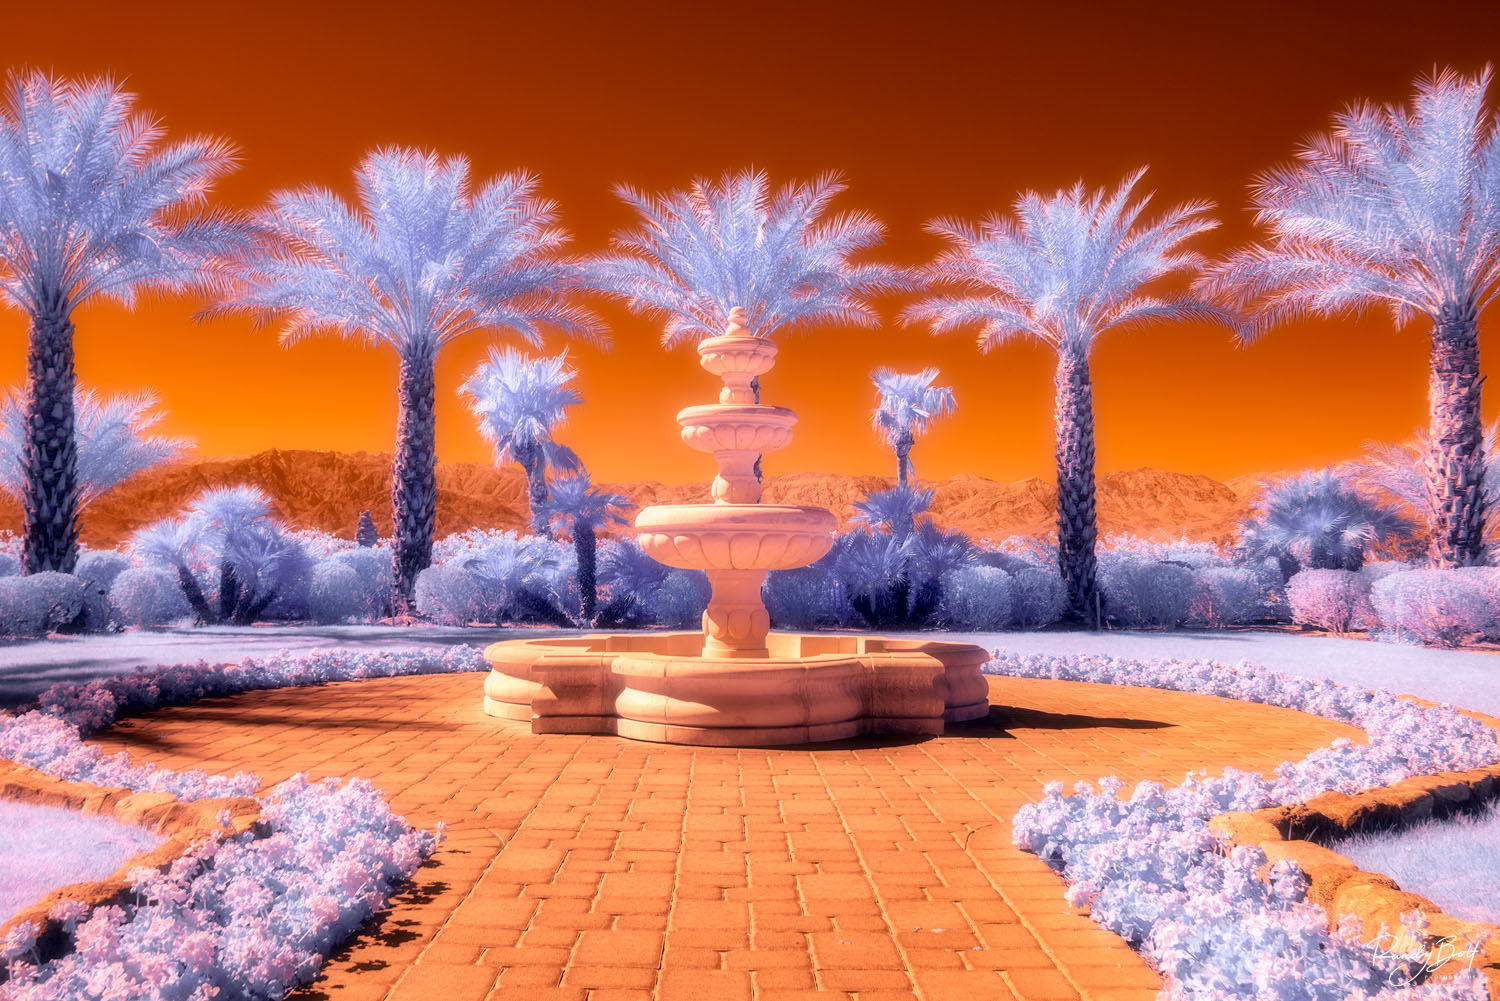
The 590 nanometer filter distinguishes itself with its unique color rendering capabilities. By allowing a specific range of infrared light to pass through, it creates images with warm and vibrant tones. This versatility makes the filter suitable for various photography genres, opening up new possibilities for creative expression.
During a recent trip to Death Valley National Park, I stopped by the Inn at Death Valley and found a scene set up for infrared photography. The palm trees are the only ones in the park and with the green branches and grass, infrared was the only choice. This image was taken with the 590 nm super color filter from Lifepixel.com. The best part is that while other photographers are done shooting after the golden hour, that's when infrared photography starts.
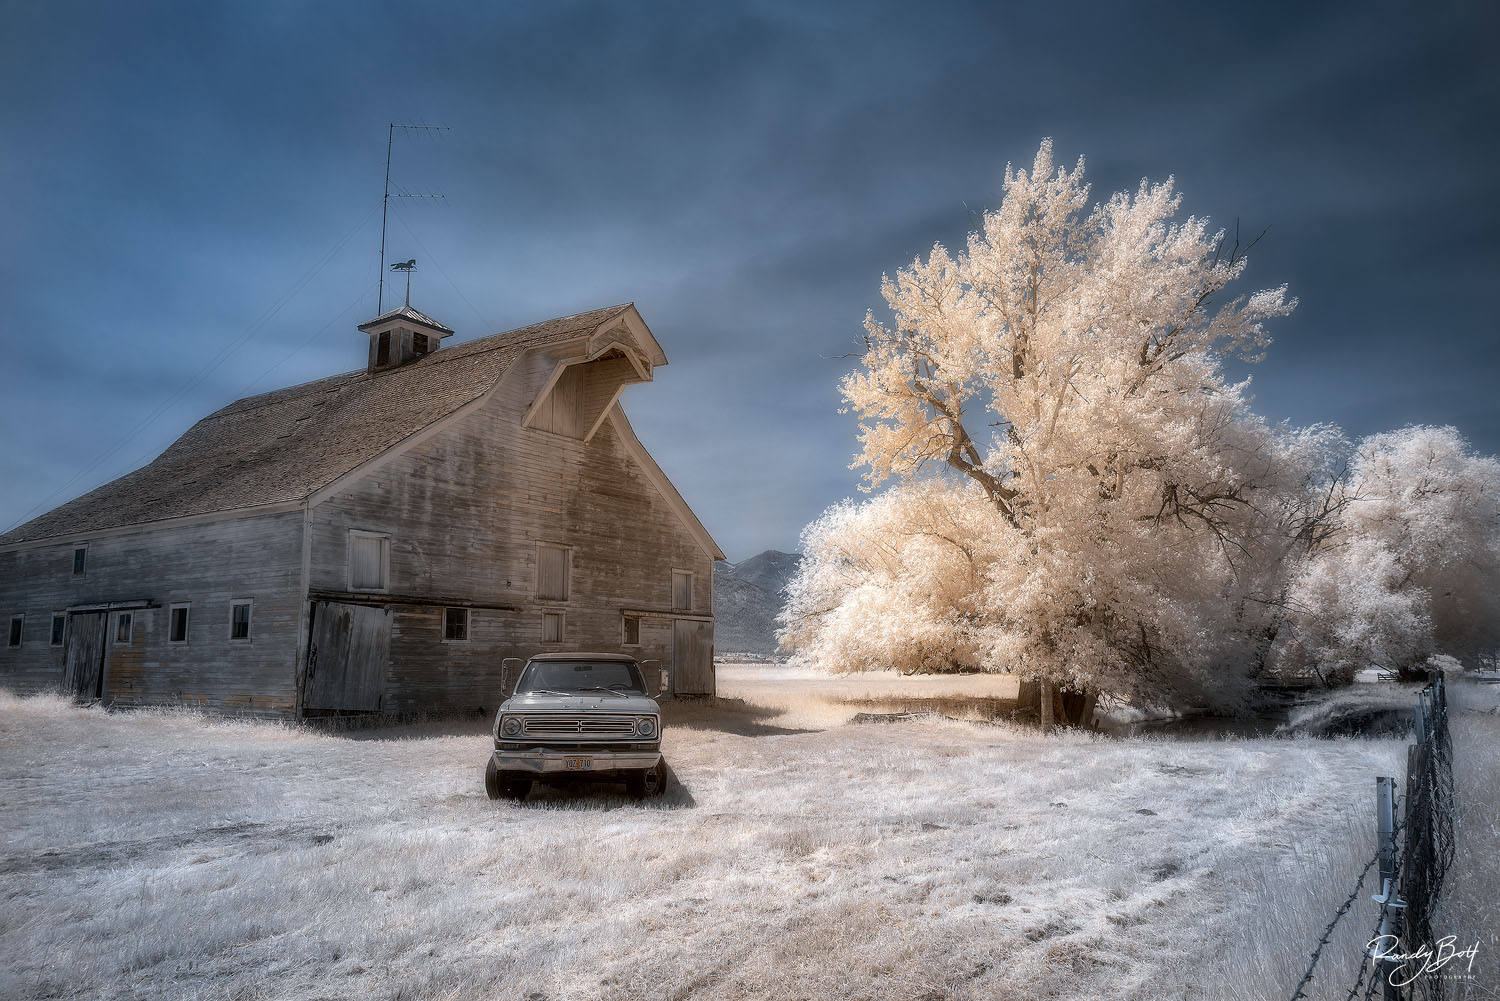
Snow Barn of Colfax
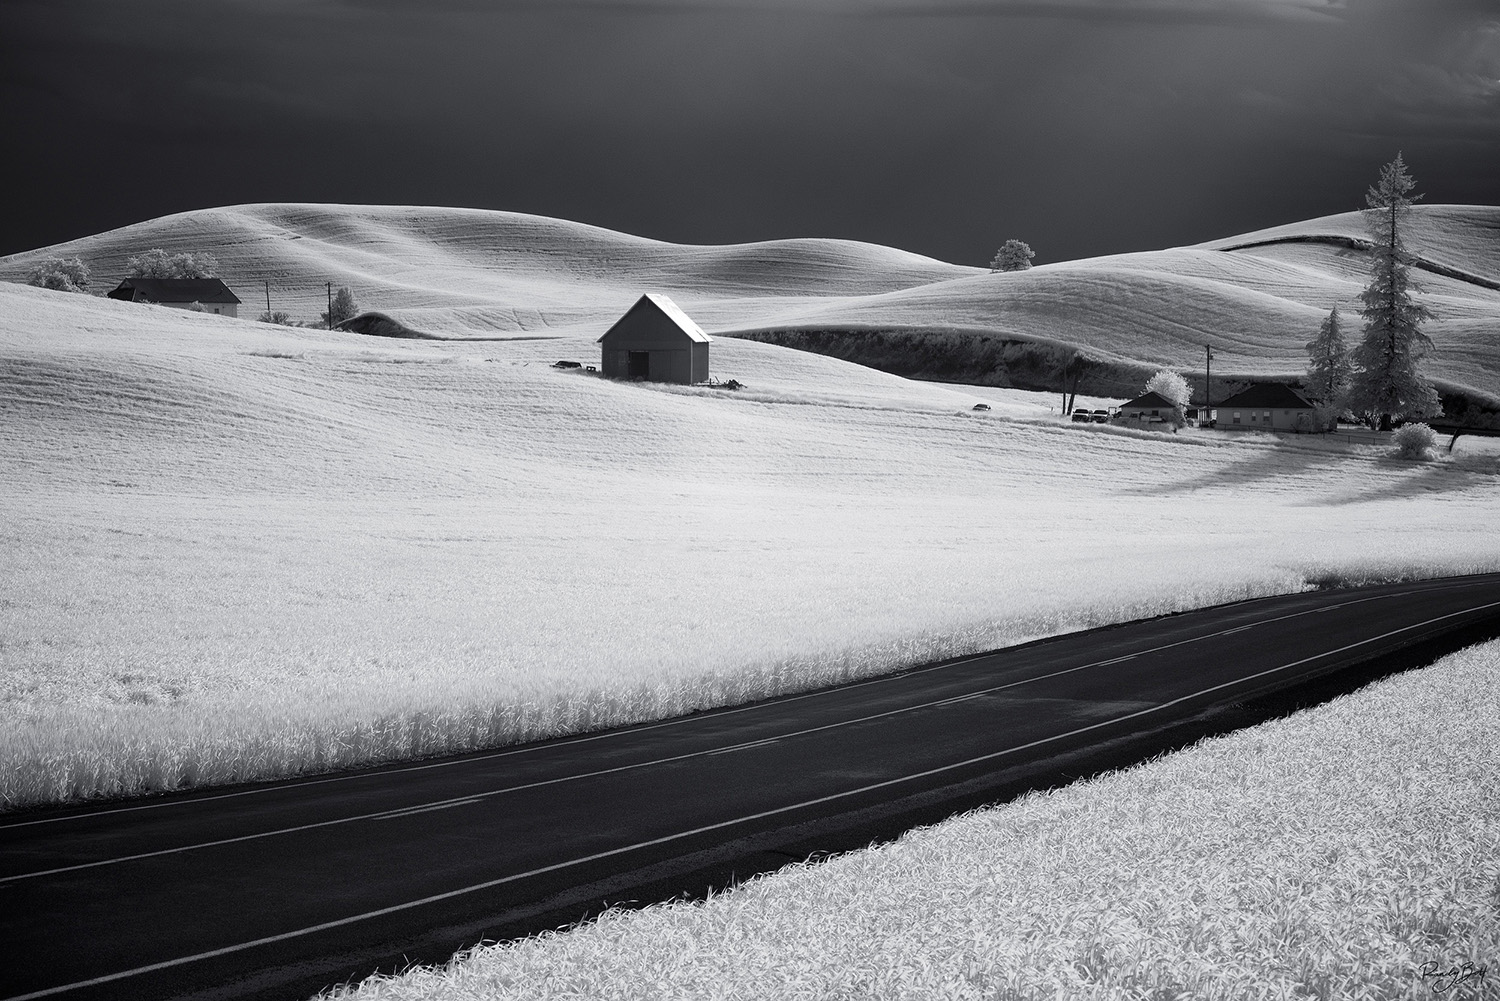
Among the various infrared filters available, the 830 nanometer filter stands out for its unique benefits. It enhances contrast, providing a rich tonal range in black and white photography. Additionally, it effectively reduces atmospheric haze, making it an invaluable tool for landscape photographers.
While out for a long bike ride in The Palouse a few years back, I saw this scene and knew I had to photograph it. When I arrived, the sun was shining through the clouds and illuminating the foreground. The 830 nm deep black and white filter was the only choice for capturing the scene. The fields of green turn white with the filter and make it look like snow. It was about 70 degrees so no snow in the forecast. After doing infrared photography for a couple years now, you begin to understand what filters work best with the scene, I still get images of the scene with different filters just to have the images.
Joseph Barn
Beyond its technical attributes, the Hoya 720 filter opens up creative avenues for photographers. From capturing unique landscapes with enhanced details to creating expressive false color portraits, this filter adds a distinctive touch to your photographic repertoire.
On the way home from a backpacking trip in the Sawtooth Mountains in Idaho, I opted for a stop in Joseph, Oregon. Photographers know this location from all the barns in the area. While driving a random road in the small town, I came across this scene that is meant for infrared photography. The owner must have known I was arriving so he staged the scene. At least that is what I'm telling myself. The Hoya R72 which is a 720 nm filter created this image. Not much visible light gets through causing the colors to be muted.
Hypercolor Palouse Barn
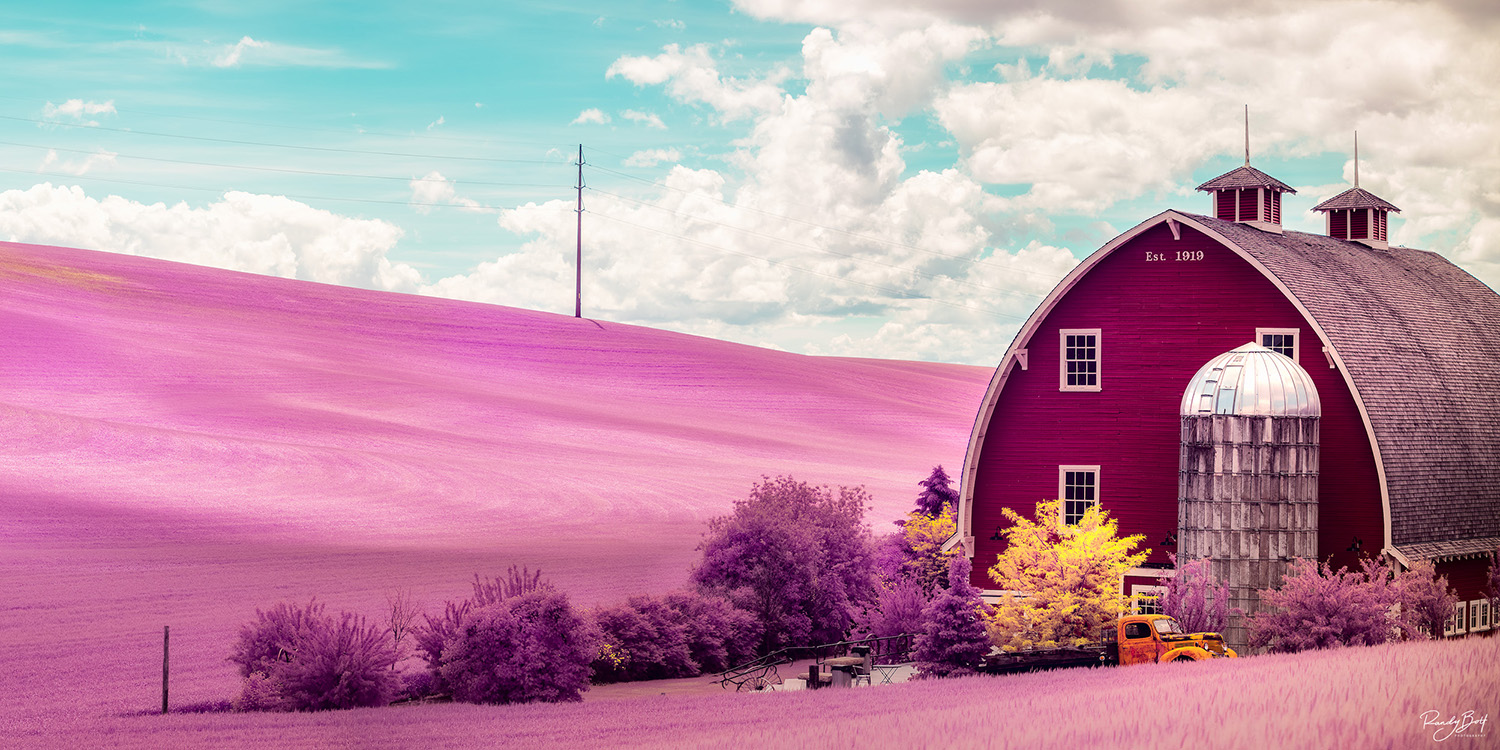
Beyond technicalities, the 470 nm hypercolor filter opens up a realm of creative possibilities. Explore capturing vibrant landscapes that burst with surreal colors or create portraits with an otherworldly and captivating aesthetic. The 470 nanometer hypercolor filter takes infrared photography to the next level by introducing vivid and striking colors. Unlike traditional infrared filters that produce monochromatic or false-color images, the hypercolor filter offers a more dynamic and creative approach to color rendering. This versatility opens up new avenues for expression across various photography genres.
The filter I use that lets in the most visible light is the 470 nm Hypercolor. This means all light above 470 nm passes through. 470 nm gets into the blue and purple colors of light turning green foliage purple. The best part of this filter is the way it separates colors of flowers and leaves from the rest of the scene. The yellow tree has yellow leaves in visible light and the truck is that orange. The Hypercolor images don't need much editing as long as the white balance is set with a white or grey card. This image can be found in the Panorama and Surreal Infrared galleries.
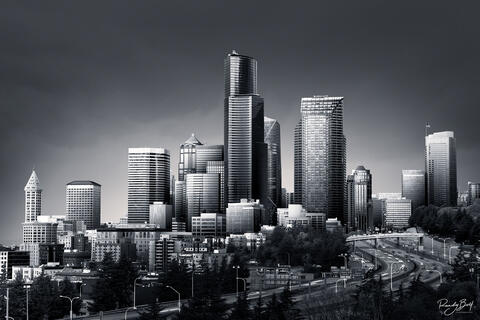
Pier 66 IR
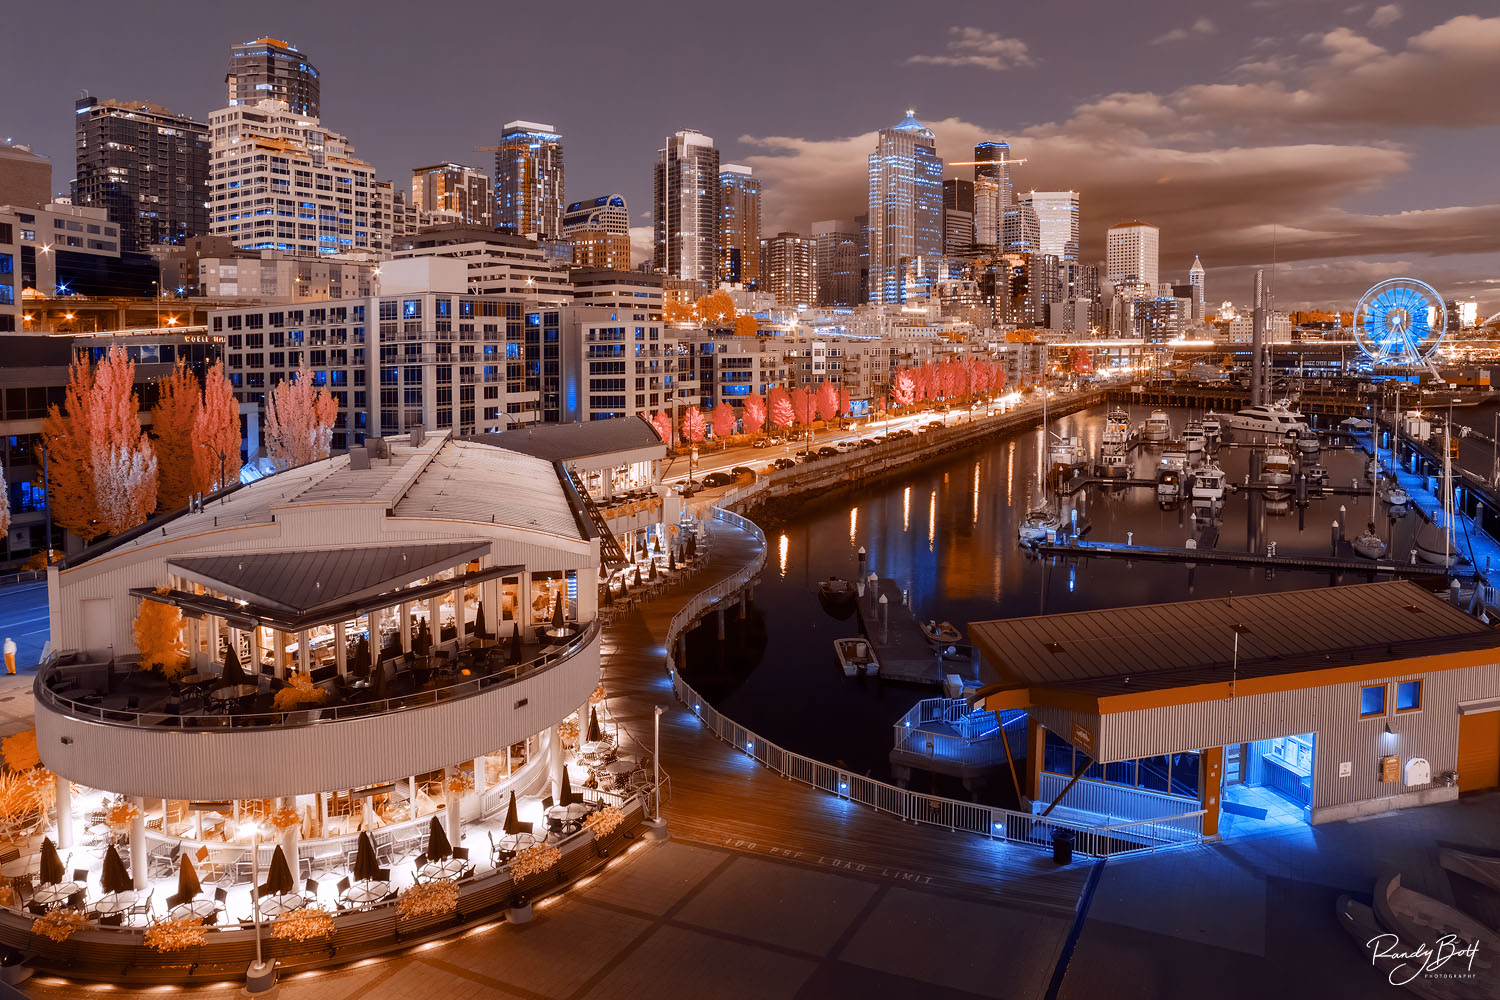
Infrared photography is not just for landscapes. It works on cityscapes at the blue hour just as well. When my infrared journey began, my camera was converted with a 665 nm filter on the sensor. I was more focused on the white foliage and blue or black sky. Cityscapes take on a new look outside of visible light. This is the first time I started experimenting with the edit process and quickly learned I'm only limited by my imagination. Infrared cityscapes create an image straight out of a science fiction movie to standout among normal fine art prints.
How do I know if my Camera is Full Spectrum?
To embark on the full spectrum journey, it's crucial to ensure your camera is capable. Check your camera's specifications; most modern digital cameras come equipped with infrared-blocking filters. However, the ease of modification varies between models.
For precise information tailored to your camera model, consider consulting Kolarivision.com or Life Pixel Infrared. They can provide insights into the feasibility of removing the infrared-blocking filter and guide you on the compatibility with full spectrum photography.
Modifying Your Camera
DIY Infrared-Blocking Filter Removal
Some adventurous photographers opt for a do-it-yourself approach to remove the infrared-blocking filter. While this can be rewarding for skilled individuals, it's not recommended for everyone, as it may void your camera's warranty and requires technical expertise.
Professional Modification
For a more reliable and refined modification, seek the services of a professional. Many experts specialize in converting cameras for full spectrum photography. This ensures precision, maintaining the integrity of your camera while unlocking its full spectrum potential.
Digital Infrared Photography Post Processing
Selecting the appropriate software is the first step in your journey to creating stunning infrared images. Opt for powerful tools like Adobe Photoshop or Lightroom that provide a wide array of features for meticulous editing.
Achieving the perfect white balance is paramount in infrared photography. Adjust the white balance settings to bring out the desired hues in your images, ensuring a harmonious and visually appealing result. Use the eye dropper tool in Photoshop or Lightroom and click on a white subject like a cloud.
In Photoshop, use the Channel Mixer tool to swap the Red and Blue channels. One of the secrets to breathtaking infrared images lies in the art of channel swapping. Experiment with swapping color channels to achieve unique and compelling color variations, setting your photographs apart from the rest.
Use your imagination. Remember, this is infrared photography. There is no right or wrong way to edit. I offer 1 on 1 editing workshops and also have an Infrared Editing Tutorial for sale.
Conclusion
At its core, IR photography encourages creativity and dares to challenge conventions. With its bold and vibrant colors, it breaks free from the traditional boundaries of photography, offering a fresh perspective that captivates the eye. By harnessing the power of infrared light, photographers can capture a hidden realm, revealing a spectrum of unseen beauty that is both mesmerizing and thought-provoking.
Through the lens of an IR camera, the world transforms into a vibrant playground of hues and contrasts. Everyday scenes take on a new life, as the invisible infrared spectrum breathes new energy into familiar landscapes. Nature becomes an exquisite tapestry of lush foliage, bathed in a surreal glow. Architecture unveils hidden details, accentuated by dramatic shadows and radiant highlights. People and animals exude an ethereal aura, their forms transcending the boundaries of the ordinary.
Infrared photography is not for everyone. Like most, I started with the Hoya R72 filter on an old camera but didn't have much luck. The shutter speed was too slow for most scene since the wind was blowing and I couldn't get the focus right. Infrared light focuses different than visible light. The best thing to do is get a camera converted from Kolarivision.com, Lifepixel.com, or Spencerscamera.com. I opted for the full spectrum conversion but other choices are available as well. If you are new to infrared, I offer a workshop in the field and post processing session with Zoom to get you started on your infrared photography journey.
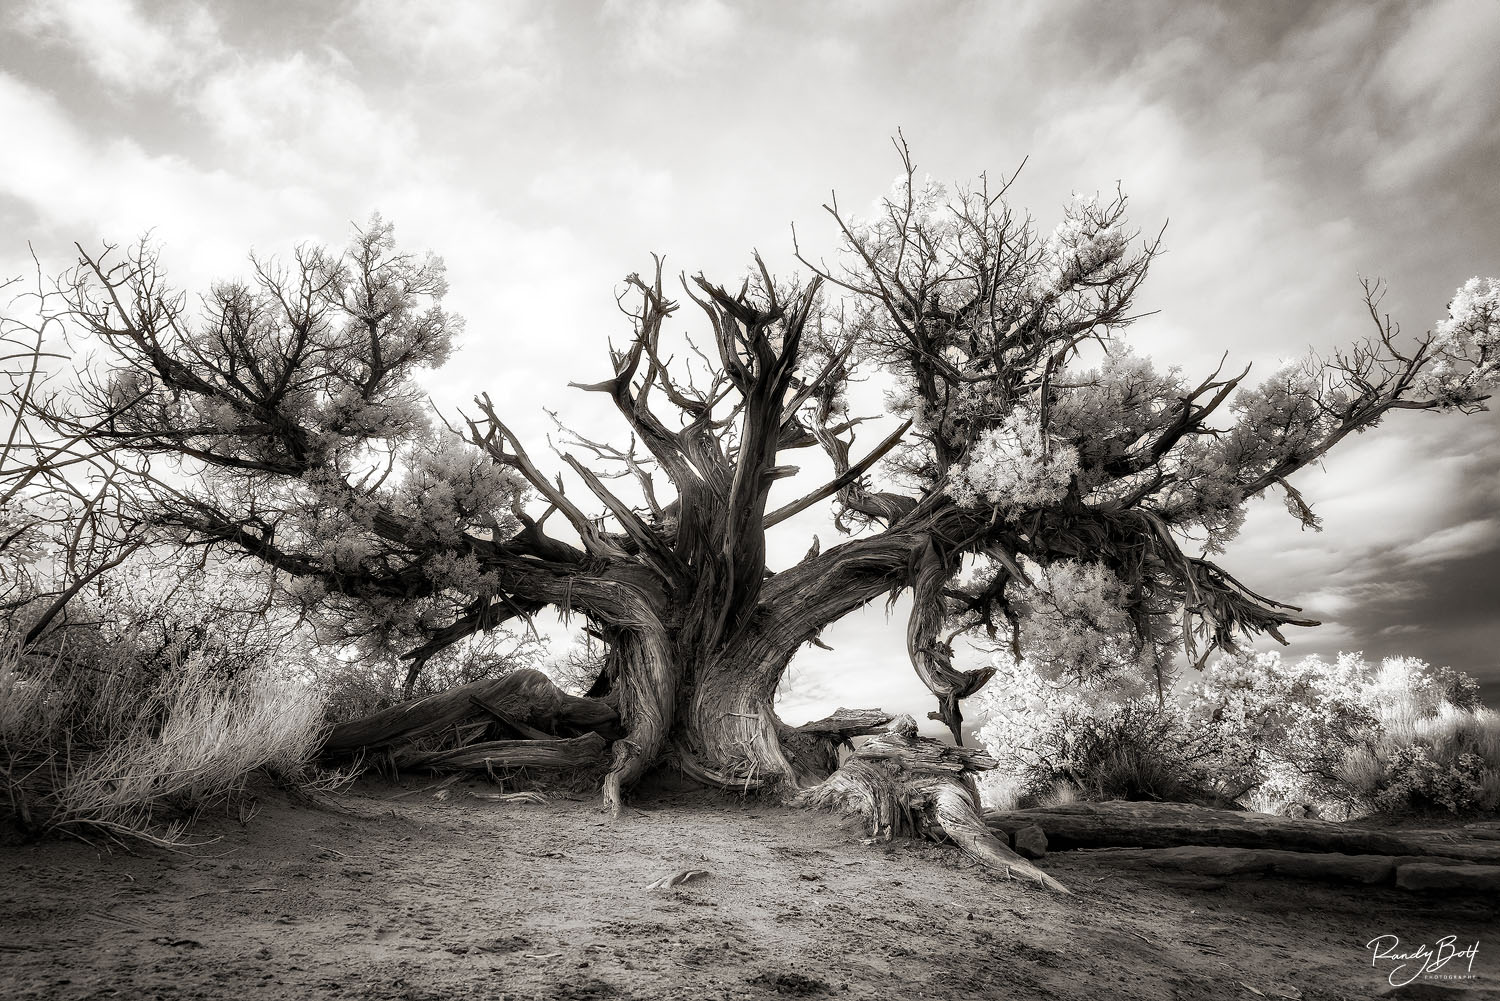
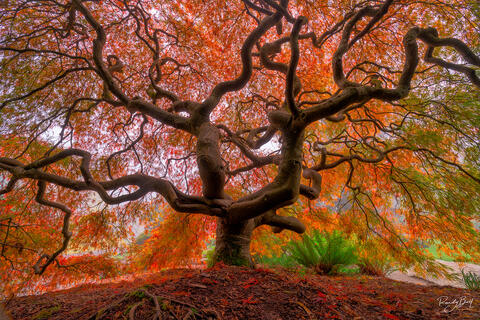
Walking back from Delicate Arch in Arches National Park in Moab,Utah after shooting sunrise, I came across this tree that needed to be photographed in beep black and white infrared. The normal scene was not that interesting but in black and white infrared, the tree looks likes something from Halloween or a mythical place from a Tim Burton movie. The camera was converted to full spectrum from Lifepixel.com and I put the 830 nm deep black and white filter on the lens to get this look. Limited edition print from the Infrared gallery.
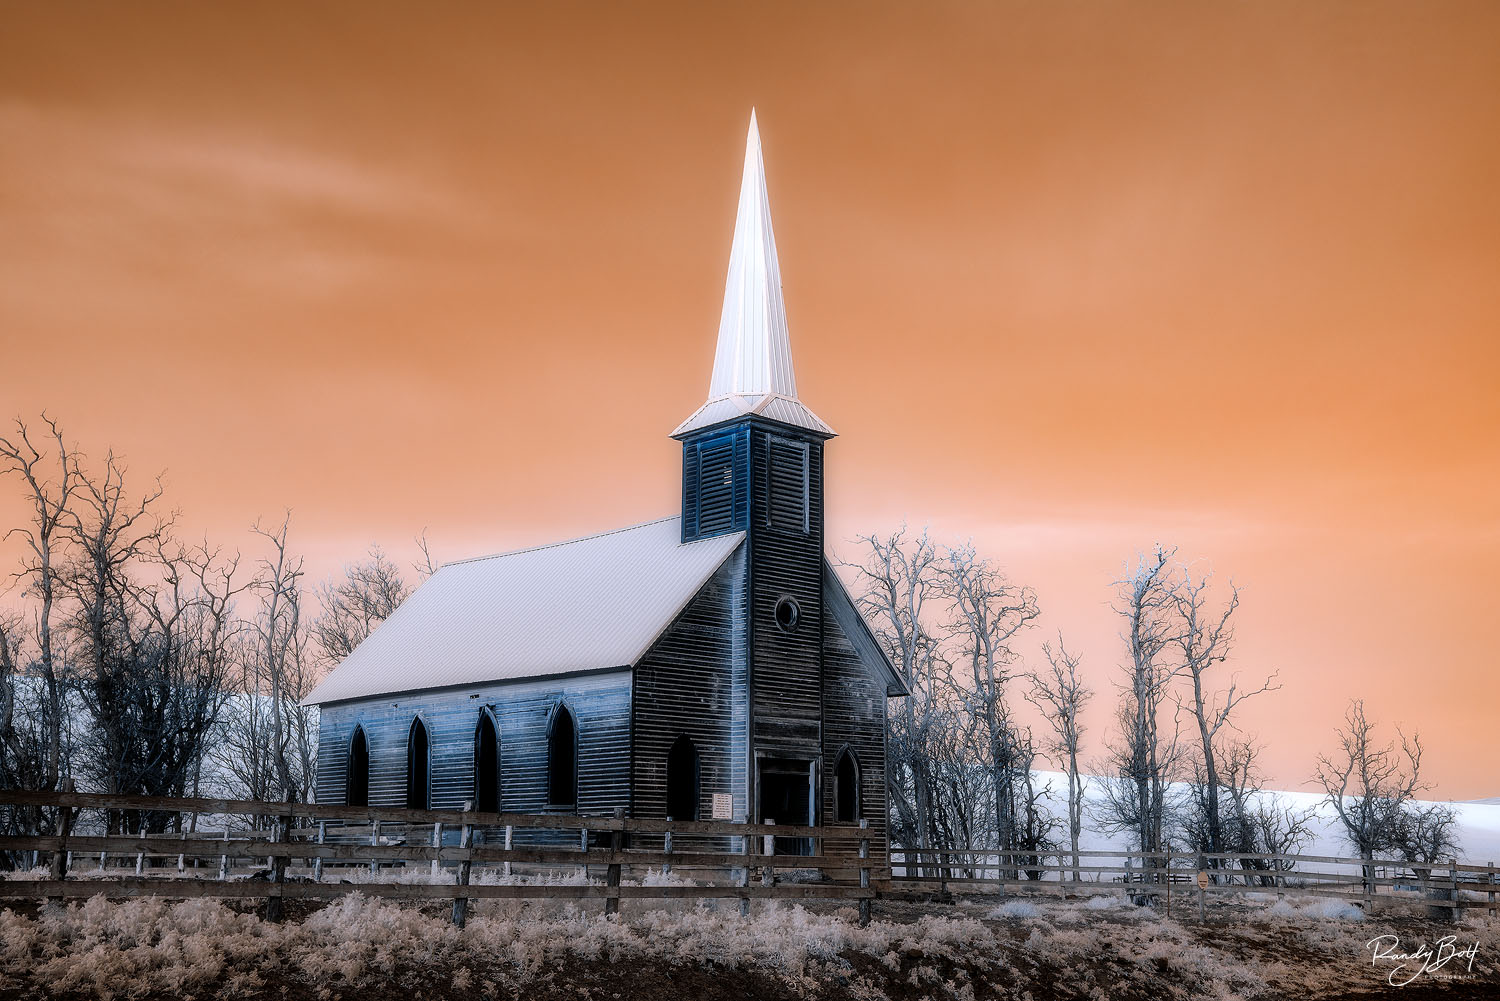
Apocalypse Church. Limited Edition of 50 Prints Available